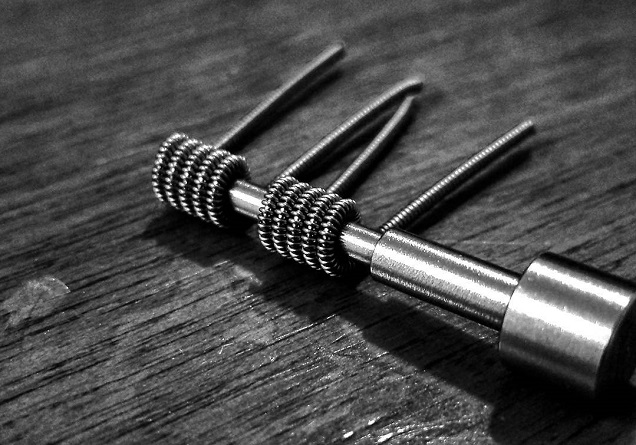
There are many types of coil widely-used by vapers. From basic kanthal options with evenly-spaced wraps through to contact coils, twisted coils, parallel coils and more, there are many more varieties of coils for vape than you might realize. For vapers who build their own coils in particular, the huge variety in different types of coil is something it’s well worth exploring, but some have become so popular that they’ve found their way into non-rebuildable tanks too. The Clapton coil is the best example of this: a once specialist coil for vape enthusiasts that is now incorporated into many pre-built atomizer heads.
But what is a Clapton coil? Why would you want to use one? How do you make them? Where can you buy them? We have the answers you’re looking for.
What is a Clapton Coil?
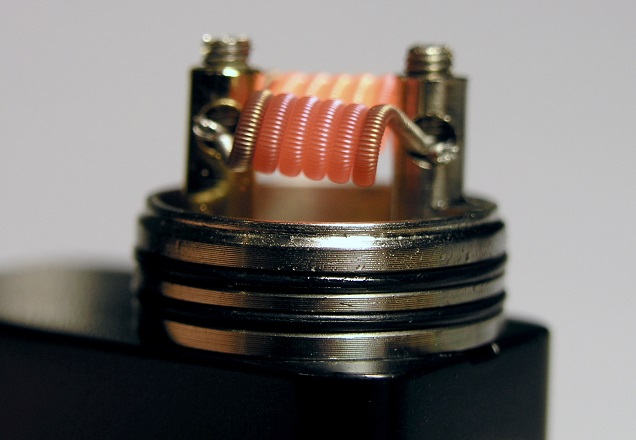
A Clapton coil gets its name from the fact that the wire’s structure is a lot like that of a guitar string. Most coils are made from single strands of kanthal, but Clapton coils are more complicated. They have a thinner, higher-gauge strand of wire wound tightly around a thicker, lower-gauge core. The wire looks just like a guitar string from the outside, but just constructed from kanthal.
This wire is then used to wrap a coil in the way you normally would. The result usually looks pretty similar to any other coil, but on close inspection the differences are easy to see.
Why Use Clapton Coil Wire in Your Atomizer Build?
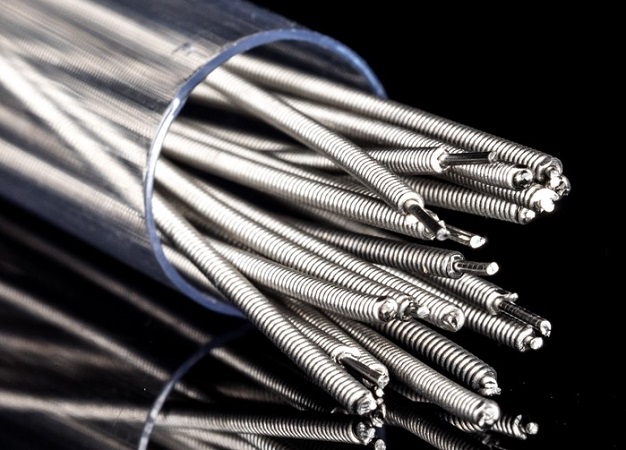
The biggest advantage of using Clapton wire in your RTA or RDA build is that it increases the surface area of the coil in comparison to ordinary wire without increasing the resistance too much. The more surface area there is to get hot, the more e-juice you will vaporize when you press the fire button. This means that the Clapton coil approach is generally better for both vapor production and flavor than a similar coil made from ordinary wire.
Ordinarily, if you use more wire, the resistance will increase as a result. So why use Clapton coil wire? Because the thicker, lower-resistance wire in the core carries most of the current and keeps the resistance of the build low. The outer, thinner wire takes less current, but still heats up quite quickly because it’s in direct contact with the already-hot inner core. This is why people generally use higher-gauge, thinner kanthal for the outer coil, because thicker wire would take a lot longer to heat up.
Downsides to Using a Clapton Coil
There are some downsides to using a Clapton coil, though. The biggest is that it still does take some time to get up to vaping temperature. Vapers call this the “ramp up” time. In general, the ramp up with Clapton wire is a bit longer because of its design. But as long as you have a variable wattage mod, you can easily increase the power to keep the performance consistent.
The other downside is that you’ll generally get through more e-liquid if you use Clapton coils. This is a bit hard to avoid if you want more vapor, though, because the only way you can do that is by vaporizing more e-juice. But it’s still something to keep in mind if you’re considering different types of coil.
Where to Buy Pre-Made Clapton Coil Wire or Pre-Wrapped Clapton Coils
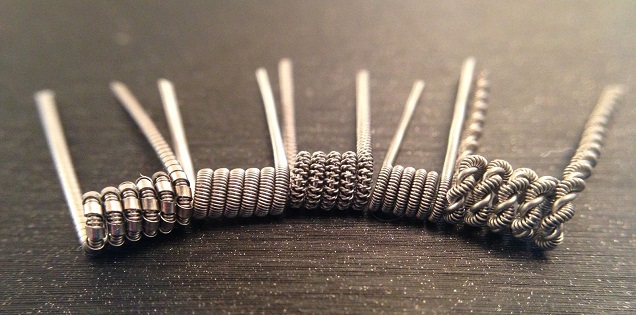
If you’re wondering where to buy pre-made Clapton coil wire, or pre-made coils themselves, the good news is that it’s widely available. If you build your own coils, but don’t want to learn how to make Clapton coil wire for yourself, the best approach is to buy pre-made Clapton coil wire. This is available from many places, but DirectVapor has a 15 ft spool available for just $8.95. All you have to do is cut yourself some off and build your coil.
If you’ve never wrapped a coil before and would rather buy the coil ready-made, there are many options on the market. Aside from completely taking the work out of making your coils, pre-made coils also make it easier to enjoy more ambitious builds. For example, this pack of 28 coils costs $14.95, but comes with a wide range of different types of Clapton coil, including spaced Clapton coils, framed Clapton coils, staple staggered Clapton coils and more. You can also find pre-made standard-style Clapton coils from a wide range of stores.
For anybody with a sub ohm tank that has optional Clapton coil atomizer heads, the best thing to do is to search for coils for your specific tank. Many manufacturers offer these, but as an example, you can buy Clapton coil atomizer heads that are compatible with most modern Kanger tanks.
How to Make Clapton Coil Wire for Yourself
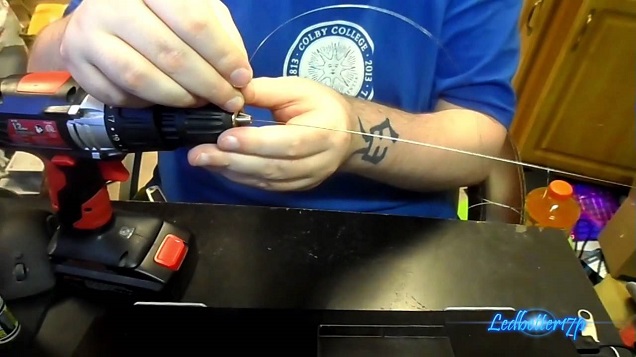
More hands-on vapers might not be interested in where to buy Clapton coil wire pre-made; you might prefer to build it for yourself. The good news is that provided you have a drill you can use, this is actually pretty easy to do.
What you will need to build your Clapton Coil: You’ll need a supply of kanthal wire, one size for the inner core and one for the outer wrapping. Although you can work with whatever you like, a 24 gauge core paired with 32 gauge for the outside is widely-recommended. Alternatively, 26 gauge for the core and 34 or 36 gauge for the wrapping works well too.
Step-By-Step Guide to Building Your Clapton Coil: There are many great YouTube videos detailing how to make Clapton coil wire, but the general process is quite simple.
- First, cut yourself a long section of your core wire, and straighten it out as much as you can. The easiest way to do this is placing one end of the wire in the chuck of your drill (i.e. the part that grips the drill bits) and grabbing the other end firmly with a pair of pliers. Fire your drill to start turning the wire slowly, holding the other end tight with your pliers, and keep going until the wire straightens out.
- With the straight piece of core wire, you’re ready to really start making your Clapton coil wire. First, get a length of your wrapping wire. You can either keep it on a spool or cut off a really long section that will give you plenty to work with. Keeping it on the spool will reduce waste, but kanthal is cheap anyway so it’s not a huge deal.
- To wrap the Clapton coil wire, you make sure your core piece is centered in your drill chuck, and then insert the end of the thinner, wrapping wire in the side of the drill chuck, between the teeth as they close together. You can put a little loop in the end of the wire to help it grip into the drill chuck. Now you should have your thick core wire sticking out of the front of your drill chuck and one sticking out from the side, at around a 45 degree angle to the core piece.
- Now all you have to do is wrap your Clapton coil wire. Hold the wrapping wire in position, right up against the core wire and with the end pointing downwards so it’s ready to wrap around the core. If you have your wire on a spool, it helps to poke a screwdriver through the center so you can hold it but still let the spool turn as needed. All you need to do now is start firing your drill – slowly at first – as you keep the wrapping wire pressed up against the core wire.
- The core will start spinning and your wrapping wire will naturally envelop it; you just have to keep it steady and make sure the wraps don’t cross over or stack up on top of one another. Don’t worry if the first few wraps in particular aren’t great. You can cut it off when you’ve done wrapping your Clapton coil wire.
- Once you’ve started wrapping and you get into the groove of it, you can speed up the drill and get through the process more quickly. Like the start, the end might not be especially neat, but you can just snip this off when you’ve done.
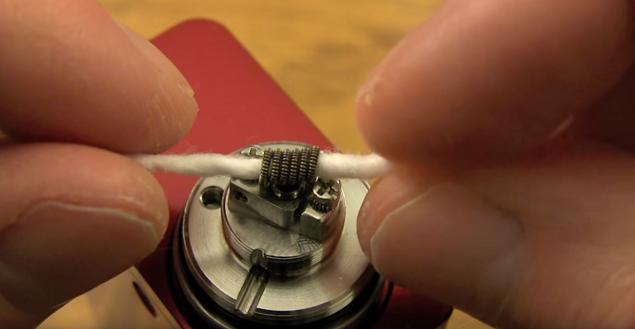
When you’ve made your Clapton coil wire, you can use it pretty much like you’d use any other vaping wire. Wrap a coil, attach it to your RBA and vape away!
Standard Clapton Coils are Just the Start
This post has focused on standard-style Clapton coils. However, as the section on where to buy pre-made Clapton coil wire and pre-wrapped coils showed, there is much more to the world of Clapton coils than this. If you make your own coils in particular, you might want to experiment with fused Claptons, framed Claptons and tons more awesome designs.
Overall, Clapton coils are fantastic when it comes to performance. But there are many types of coil used for vaping, and all have their advantages and disadvantages. The best advice is to explore the options, try out new coils and keep searching for your perfect vaping experience.

