
Two of the most common tasks you’ll have to do as a vaper is filling up a tank or clearomizer and replacing a spent coil for a new one. Thankfully for those new to the hobby who don’t want to have to mess around too much, these are both really easy to accomplish, regardless of the type of vape tank or clearomizer you have. There are a few small differences depending on the specific device you’re dealing with, but on the whole this process will prepare you sufficiently for any refillable atomizer you’re likely to get your hands on.
Types of Clearomizers and Vape Tanks
There are a lot of different vape tanks and clearomizers on the market today, but in terms of how they’re put together and how you use them, the variety really doesn’t have much of an impact. In this post, we’ll be focusing on non-rebuildable devices (we’ll cover rebuildables in a Basics of Vaping post in the future), so the main types we’ll be considering are:
- Top-coil clearomizers – like the CE5.
- Bottom-coil clearomizers – like the Aspire BDC or the Kanger Protank.
- Sub-ohm tanks, either top or bottom-filling – like the Kanger Subtank or the Aspire Atlantis.
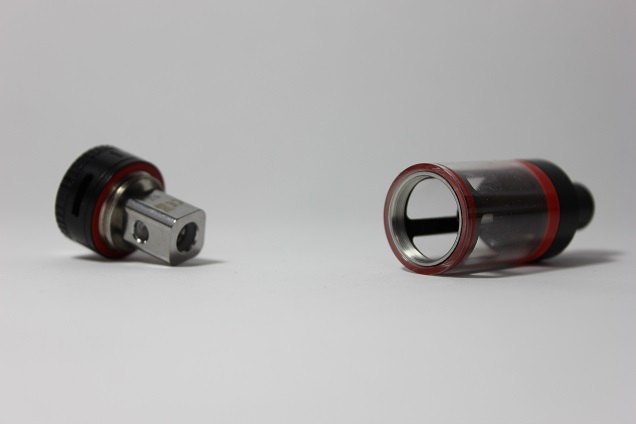
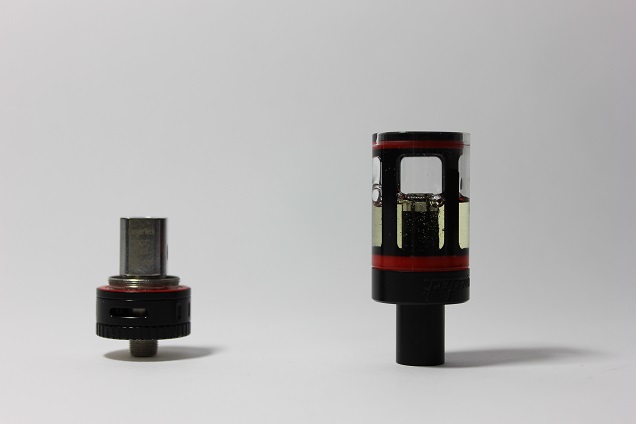
All of these clearomizers and vape tanks, despite their apparent differences, work in roughly the same way. Inside the tank section – which can vary in size – there is a central stem portion, which takes air up from the airflow holes, allows it to pass over the coil and brings the resulting vapor up to your mouth. The atomizer head attaches to this central stem, either at the bottom of it or up at the top of it (hence the names bottom and top-coil clearomizers).
The tank portion surrounds the whole thing, connecting to the base of the clearomizer or tank and the top section of it. In some cases – for example, on most sub-ohm tanks and bottom-coil clearomizers – the atomizer head may connect to the base of the tank rather than the central stem, but it’s always connected to it in some way.
No matter which type of clearomizer or tank you have, this should give you a good idea of the key components of it and how it works. There's more information on this in our post dedicated to the topic.
Disassembly – Taking Your Clearomizer or Tank Apart
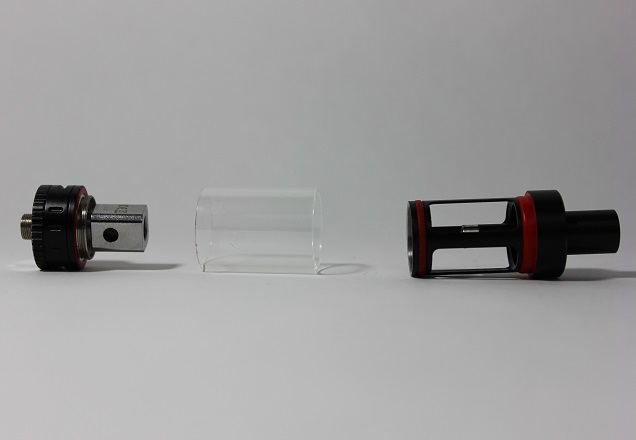 Most tanks and clearomizers have a screw-on base and either a screw-on or press-fitting tank section.
Regardless of whether you’ll be changing a coil or refilling your tank is taking the thing apart to get access to the tank and coil section. This is easy on any type of device: the glass tank section screws in to the top or bottom of the tank (or both), and it can be unscrewed as you would expect. Some tanks don’t come apart at both ends, though, and some use O-rings on one side so the tank section is held in place by friction alone, and can be pulled apart without unscrewing.
Bottom-Coil Clearomizers Disassembly
For bottom-coil clearomizers, unscrewing the bottom is all you need to do to get access to the coil. When you unscrew it, the base will come out along with the atomizer head, with the stem remaining inside the clearomizer. This means if you invert the clearomizer before unscrewing, you can even get access to the coil without emptying the tank.
Top-Coil Clearomizers Disassembly
For top-coil options, you get access to the coil in the same way, with the only difference being that the stem will also come out. This, in turn, means that you can’t access the coil without emptying the tank first. If you just want to refill, most top-coil clearomizers have a drip tip that screws into place, and you can just remove this to get access.
Sub-Ohm Tanks Disassembly
Sub-ohm tanks (and other tanks) largely work much like bottom-coil clearomizers: you unscrew the base to get access to the coil, and this can usually be done without emptying the tank first (depending on whether the connection between the tank and the top section of the atomizer is secure). For filling, most sub-ohm tanks are filled from the bottom, so this is all you need to do. Modern devices are trending towards a top-filling design, though, and in these cases all you need to do is unscrew the top (or uncover a filling port) if you want to refill.
The remainder of the disassembly process is fairly straightforward. You’ll need to empty the tank before you do this (unless you want a big juice spill to clean up). For sub-ohm tanks, the top section of the tank will either be screwed in place or just held in with the help of some O-rings, so they’re easy to take apart. For clearomizers, the coil section is often the only part you can really take out, but this is more than adequate for cleaning.
Changing Your Coil
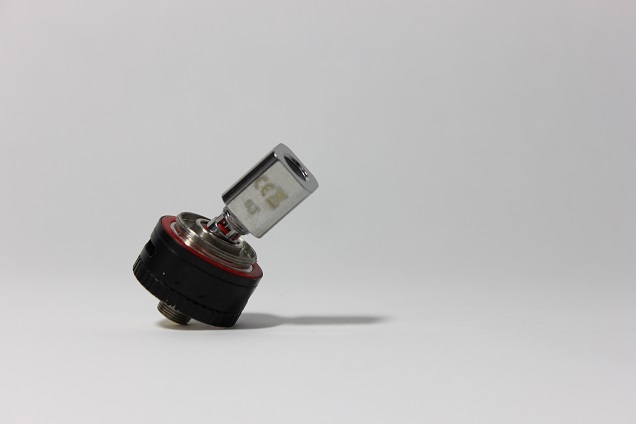 Coil heads simply screw into the base on most modern atomizers.
Once you’ve gotten access to the coil section of your tank or clearomizer, changing the coil is really simple. All tank or clearomizer style atomizers, regardless of which type, have coils which simply screw into place, either at the base of the device or at the top of the stem.
So all you have to do to change coils is unscrew the old one (use a paper towel if it’s still covered in juice to avoid getting it on your hands) and screw the new one into the same spot. Make sure you screw the new coil into place firmly, so there’s no chance for juice to leak through but also so it can be removed easily enough.
The new coil and wick setup will be completely dry, though. Once you’ve filled up, you may assume that the wick will be soaked and you’ll be ready to vape, but this isn’t the case. It takes a little bit of time for the liquid to fully soak into the wick, so you need to wait a few minutes before you start to vape. Two minutes should usually be long enough, but make it three to be extra-safe. Pressing the fire button when your wick isn’t soaked may lead to it getting burned, and it could ruin the whole atomizer head, so it’s better to err on the side of caution.
Refilling Your Vape Tank or Clearomizer

Refilling is the thing you’ll have to do most with your tank or clearomizer. The process is very easy, but it’s important to get it right to avoid spills, leaks or other issues.
Get access to the tank in the way described in the disassembly section – usually by unscrewing the base with the tank inverted, but from the top with top-coil clearomizers and top-filling tanks.
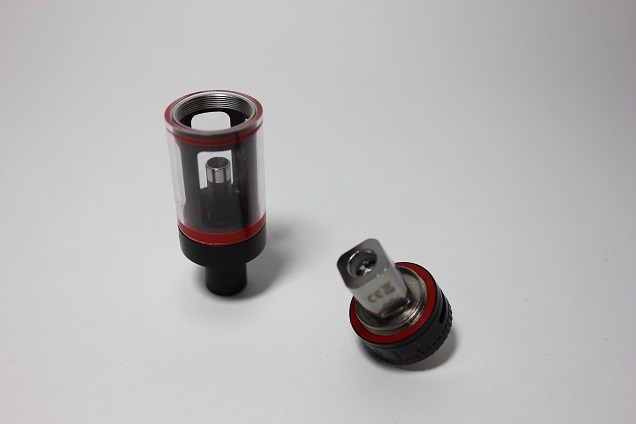 The center tube in your tank leads right to the mouthpiece, so don't get any juice down there when you fill up!
Avoid getting e-liquid down the center tube
The golden rule for refilling is to avoid getting liquid down the center tube. This may lead to leaking, because the central tube goes right up to the mouthpiece and right down to the base of the tank (although your coil will be in the way). Getting juice down the center tube may also “flood” your coil – where too much liquid gets into the chamber – which can lead to gurgling and impact on the performance of your atomizer.
 The maximum fill level is often not shown explicitly, but determined by the design. Here, the Subtank can't be filled any more without getting juice down the center tube.
With that in mind, all you need to do is use the dripper top on your e-liquid bottle to fill the tank or clearomizer’s juice reservoir to the maximum fill level, which will either be indicated by a mark or some in-built design feature (for example, the furthest you can fill without juice overflowing into the center tube). The best way to avoid the center as you’re doing this is to tilt your tank or clearomizer and let the liquid stream down the inside of the tank, a little like you’re pouring a beer. Straighten it up as it fills to ensure you don’t fill too much.
What if you get e-juice down the center tube?
If you do get some e-juice down the center tube, don’t worry too much. Get a paper towel and place it either over the mouthpiece (with most tanks, this is easier) or the battery contact (for clearomizers) and blow sharply down the other end. This will clear any e-juice out of the tube and prevent any issues.
Conclusion – You’re Ready to Vape
Aside from device-related issues and some general maintenance, if you can refill and change coils, you know everything you need to in order to vape. It might seem like there’s a lot to learn, but with these simple skills, all you really need is a supply of e-juice and coils and you can happily vape away based on what you’ve just learned. If you get into the hobby a little more, there’s a lot of other stuff to learn, but if you’re just looking to quit smoking, these key skills will be all you need.