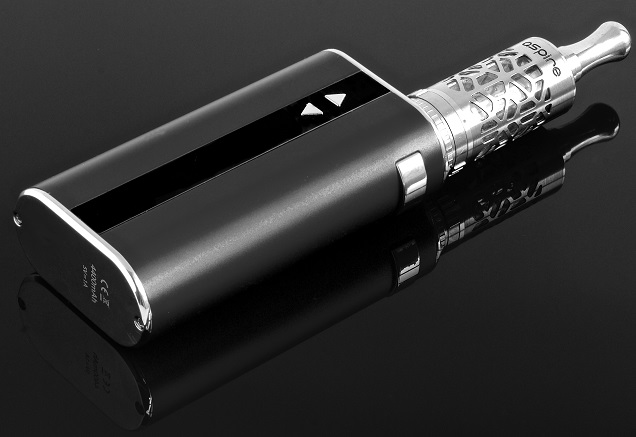
Although eGo-style or cigalike devices are generally preferred by those first getting started with vaping, it usually doesn’t take too long for newer vapers to make the move towards more advanced mods. Most mods these days are variable voltage / variable wattage (VV/VW) devices, which allow you to choose your own power setting and support a much wider range of atomizers. These represent a big step up when it comes to performance, but they can also be a little overwhelming for newer vapers. So here’s a basic run-down of what VV/VW devices are, how to use them and what type of settings you should use for different types of tanks and atomizers.
Electronics 101: What Do Voltage and Wattage Mean?
Before we get onto the specifics of VV/VW mods, it’s worth taking a broader look at what voltage and wattage actually are. Batteries are basically devices that separate positive and negative charges, despite the fact that they’re naturally attracted to each other. This is like the way that gravity may try to pull a ball directly down to the ground, but you can still pick it up and even walk it to the top of a hill. When you’re at the top of the hill with the ball, it has potential energy: if you let the ball rest on the slope, it’ll roll right down to the bottom and pick up quite a bit of speed on the way down too.
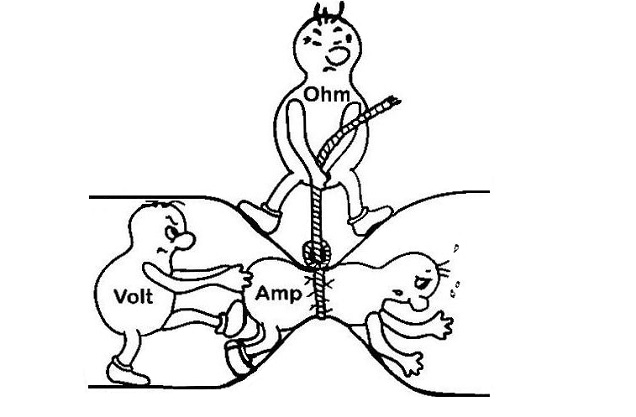
In the same way, the poles of a battery have a difference in potential energy between them, and this difference is called the voltage of the battery. Like the ball example, this basically tells you how much energy something can pick up by releasing its potential. A fully-charged battery has 4.2 V of potential, and connecting either end of the battery to a circuit is like setting the ball down at the top of the hill and letting it roll down. The charge stored in the battery can be released and flow through the circuit as a current, being “pulled” to the other end of the battery like the ball rolling down to ground level. In a circuit, the equivalent of the friction that slows the ball as it rolls down the hill is called “resistance,” and is measured in ohms.
Although the metaphor is a little different, this picture is a nice summary of the situation:
Wattage is a little different, but is so closely related to the voltage that from a vapers’ perspective it might as well be the same. The wattage is a measure of the amount of energy flowing through the circuit per second, and it’s really just called “power.” Because the voltage dictates how much energy can flow, adjusting the voltage and adjusting the wattage basically accomplish the same thing.
Note that in some temperature control (TC) devices, you can adjust the “joules.” A joule is a measure of energy, and a watt is actually just a joule per second. So when you’re adjusting the joules on a TC device, it’s basically the same as adjusting the wattage.
What are VV/VW Mods?
The best way to understand VV/VW mods is by first considering the alternative: “unregulated” mechanical mods. These devices don’t have any complicated circuitry or anything of the sort: they just use the voltage created by the battery, so 4.2 V on a full charge. As the charge runs down, the difference in potential between the two parts of the battery decreases and so the power the battery can supply decreases too. This is why mechanical mods work best on a full charge.
VV/VW mods improve things by giving you a consistent voltage when you vape, and more than that, they actually let you choose the voltage you want. This can be higher than the voltage you could get from the battery otherwise, so they allow high-power vaping without the need to reduce your resistance to very low levels. However, in practice most vapers use fairly low-resistance coils anyway, while still enjoying the benefits of being able to set the power to whichever level you like.
The additional benefit of VV/VW mods in comparison to mechanical devices is that they come with in-built safety features. For example, if you put the battery in the wrong way round, they’ll refuse to fire, or if you’re trying to use a battery that’s drained, they’ll display a “low battery” message and refuse to work so you have to charge. They also have maximum current limits built in so you don’t try to push your battery too far. This type of feature means you can vape with a bit more peace of mind.
Finally, there are also plenty of handy little extras manufacturers can build into these devices. Almost all can read the resistance of your coil and display your remaining battery level. Additionally, many modern devices offer temperature control, which stops the coil from going over a pre-specified temperature. This means that you can completely avoid “dry puffs,” which is where there isn’t enough e-juice in your wick and it gets “overcooked,” so to speak, and tastes really awful.
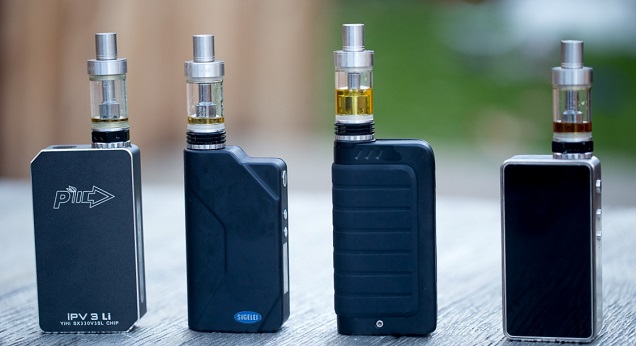
Most VV/VW mods these days are “box mods,” which means they’re roughly box-shaped. They tend to have display screens that show all the key information, like your current setting, your coil’s resistance and the remaining battery life. Aside from the “fire” button you press to vape, they almost all have “up” and “down” buttons used to adjust your setting to your liking.
What Setting Should I Use for a VV/VW Mod?
So VV/VW mods are fairly straightforward, but knowing the basics of what they are and what they can do doesn’t tell you much about what you actually need to do as a user. The big issue is simple: what setting should I use?
Well, the answer isn’t as cut-and-dry as you might hope, but there are a few things you can think about to help you find the right setting.
What Type of Atomizer Are You Using?
The biggest factor in determining the sort of setting you should use is your type of atomizer, both the design and the resistance of the coil you’re using.
Basic clearomizers (e.g CE5, Vivi Nova)
Although most mods don’t support basic clearomizers (the type you find on smaller, eGo-style devices) because of the threading on their connections, devices like the eGo Twist still have variable voltage, and mods can support them if you have an adapter. For this type of atomizer, charts like the one below (which were around when these atomizers were more common) are actually great guides.
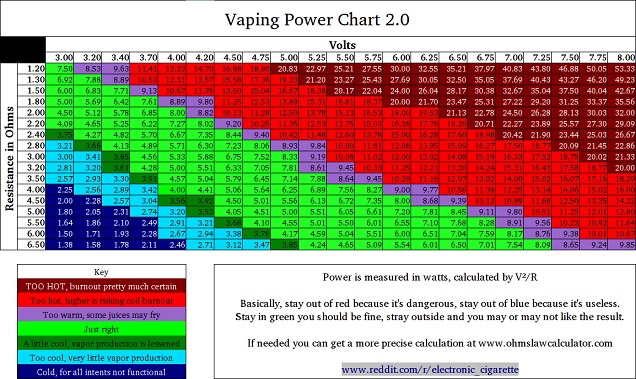
The resistance of the coil is displayed on the left (and this should be shown somewhere on your coil or the packet you got it in) and the voltage is shown along the top. In the center, the wattages are shown. In general, you’ll want to be somewhere between 5 and 8 watts with basic clearomizers, possibly higher.
Bottom coil clearomizers (e.g. Protank, Aerotank)
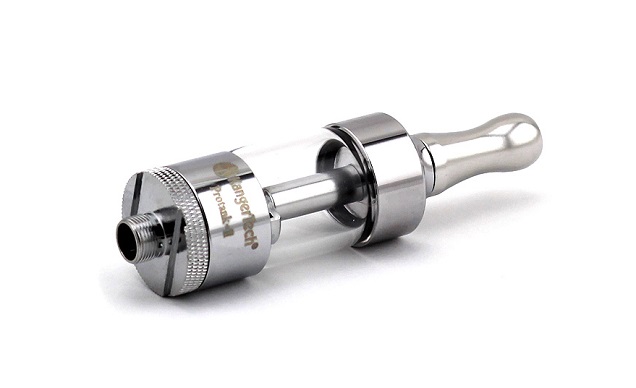
For higher-quality but still straightforward clearomizers like the Kanger Protank or Aerotank, the chart above still largely applies, but you may be able to stray more towards the upper end of the recommendations. In some cases, you can vape at around 10 watts without issues. However, it’s best to start at 7 W or so and work your way up. You’ll know if you go too far if the flavor starts to diminish.
Modern, Non-Sub Ohm Tanks (e.g. Aspire Nautilus)
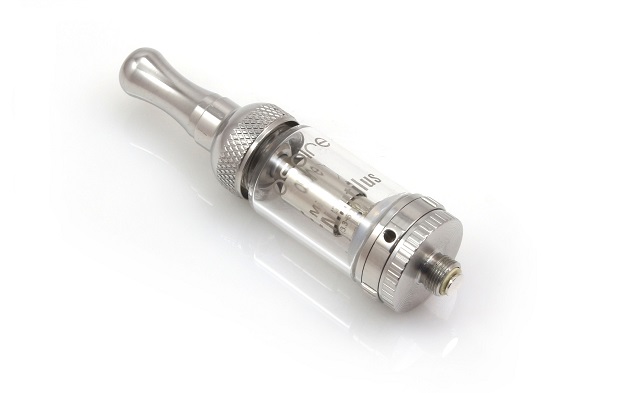
More modern tanks like the Nautilus can handle higher wattages than older models, thanks to their improved wicking ability. However, the advice for these types of devices is much the same as for older models – start fairly low (7 or 8 W is still a good starting point) and gradually work your way up. You may be able to reach 12 W or higher on a device like the Nautilus without ruining the taste of your juice or getting any burnt hits.
Sub Ohm Tanks (e.g. Subtank, Atlantis)
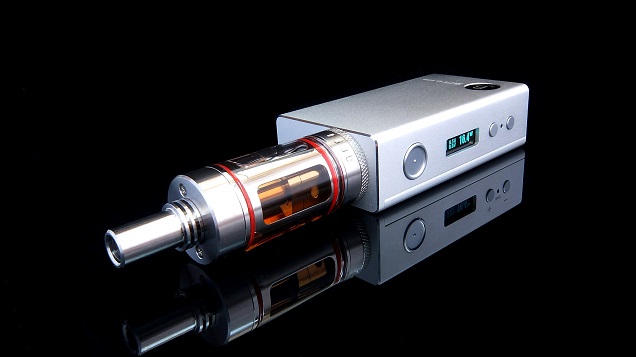
For sub ohm tanks, the wicking ability is vastly improved, and in combination with the low-resistance coils, this means you can go much higher with your wattage than you’d be able to otherwise. However, following the same basic approach as above is still a good way to settle on the right setting. Start at 15 to 20 W and work your way up until you hit the setting that works for you and the e-juice you’re using.
I’m not much of a high-power vaper, so between 30 and 40 W is usually more than enough for my tastes, but many vapers go a lot higher, and sub ohm tanks make this possible. Again, the flavor you’re getting from your juice is the best thing to use as a guide: every juice and atomizer combination has its own “sweet spot” wattage, where the flavor really starts to shine without tasting burnt or leading to dry hits. Finding this is a challenge, but if you experiment a little, you’ll find the right setting for your needs.
If you’ve looked around for a chart like the one in the first section for sub ohm tanks, you may have noticed there aren’t many around at all, and most focus on battery safety rather than the best settings to vape at for the best performance. The reason for this is simply that there is so much variation between the settings vapers use that it’s hard to make definitive recommendations.
One thing to keep an eye out for, though, is a suggested wattage range on your coils. This is becoming more and more common – for example, the Kanger Subtank’s 0.5 ohm coils suggest using a wattage between 15 and 60 W. This is quite a wide range, and just goes to show how much the settings used can vary, but you can use this as a guide as to where to start. 15 W is unlikely to do it for you, so bump it up to 18 or 20 W and try it again. Then go up a few more watts and try again. Eventually you’ll find your sweet spot.
Rebuildable Atomizers (RDAs and RTAs)
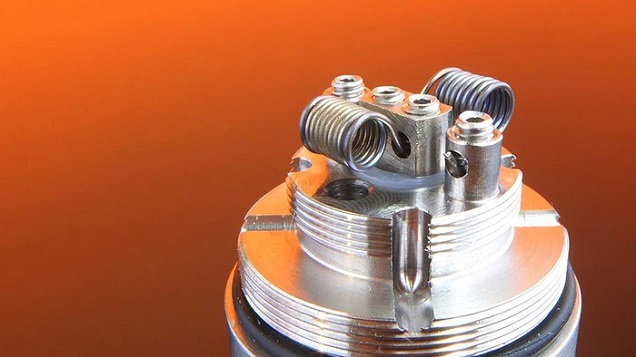
For rebuildable devices, the advice is much the same as for sub ohm tanks: start at a fairly low wattage, then work your way up until you find something you like. The main difference is that you don’t get suggestions for wattages with rebuildable atomizers, but I tend to treat them roughly the same – start out at 20 W or so and then increase it to suit your preferences.
What E-Juice Are You Using?
The other big factor in determining the setting you should use is the juice you’re vaping. Although the specific mix of flavorings will impact where the “sweet spot” for the blend is, if you’re looking at getting good performance without dry hits, the PG/VG ratio of the juice is the most important thing to consider.
The main issue is that VG is more viscous than PG, so higher-VG liquids won’t soak into your wick as quickly. The issue with this is that when you take a puff, you vaporize the juice currently soaked into the wick, and it has to be replenished before you take another puff. For higher-PG or 50/50 mixes, this generally works well enough that it never causes an issue. However, for higher-VG blends, it can cause a problem with higher settings.
However, the problems very much depend on the atomizer you’re using, and specifically, how quickly it wicks up juice. To take an extreme example, early clearomizers that had a top-coil design and used silica wicks were very bad at wicking. They couldn’t cope too well with high-VG juices in any case, but particularly at higher settings. In comparison, most sub ohm tanks can deal with higher-VG juices with no problems at all.
So if you’re using a rebuildable atomizer or sub ohm tank, the VG content of your juice is less of a concern. If you notice dry hits (which you would notice, because they really don’t taste nice), then turning down your power setting a little is advised, and you’ll probably find that high-VG liquids work best with a slightly lower setting than higher-PG blends. For more basic clearomizers, this difference is more pronounced: you’ll run into dry hits at much lower wattages with a high-VG liquid than a high-PG one.
Experiment and Find What Works for You
Hopefully this post has taken some of the mystery out of finding the right settings for your mod, and shown you that it really isn’t as complicated as it might seem at first. You may have been hoping for some more concrete recommendations, but the reason we didn’t offer many is because personal preference plays a big role in choosing your setting. Ardent cloud-chasers would scoff at me vaping at 30 W, whereas mouth-to-lung loving, high-ohm vapers might think I’m a cloud-chaser myself. There are no right or wrong answers, so really the best advice is to experiment a little and find what works for your preferences. This post should give you some general guidelines, but only you can find the right setting for your needs.

